Verify Browser Support
Cesium requires browser support for WebGL. You can test whether your browser supports Cesium using a HelloWorld example provided on the CesiumJS official website. (Chrome is recommended) Test URL: https://cesiumjs.org/Cesium/Apps/HelloWorld.html
Choose an IDE
The official website states:
| |
If you’re already an experienced developer, you likely have a preferred editor or development environment; for example, most of the Cesium team uses Eclipse. If you’re just starting out, Notepad++ is a great free and open-source editor that you can download from their website. Ultimately, any text editor will work, so use whatever you’re most comfortable with.
Personally, since I mostly developed in PHP before, I use PHPStorm. I actually don’t recommend Eclipse — I prefer WebStorm, which shares the same parent as IntelliJ IDEA. Considering project and folder management, I also don’t recommend Notepad++. For a lightweight IDE, I recommend Sublime Text.
Download Cesium Source Code
Download the latest release version at: https://cesiumjs.org/tutorials/cesium-up-and-running/
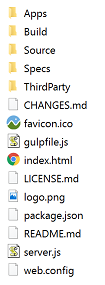
After downloading, extract the zip file into a new directory of your choice. I’ll refer to this as the Cesium root directory throughout this tutorial. The contents should look like the following:
Simply opening index.html directly won’t work — it needs to be placed in a web server container to run.
Server Side
Cesium is pure frontend code. The official source code comes with a Node.js server, and you can install and deploy via Node.js. In practice, Cesium can be deployed in Tomcat (GeoServer), Apache, Nginx, and other servers.
The official recommendation is Node.js:
- Download Node.js from the official website (https://nodejs.org/en/). Node.js has some configurable parameters, but the defaults are fine.
- In the Cesium directory, open cmd or bash and run:
| |
This downloads the required npm modules such as express. If successful, a ’node_modules’ folder will be created in the Cesium directory.
3. Finally, run in cmd or bash:
shell node server.js or
shell npm start
- After success, you should see the following screenshot:
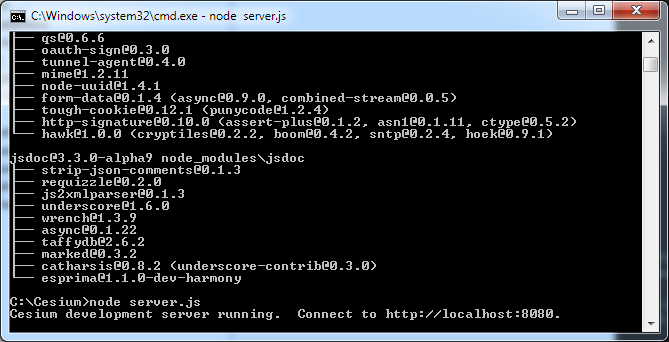
The console will display:
| |
Note: Do not close the console — keep it running. Open your browser and navigate to http://localhost:8080 to access Cesium.
If You Don’t Want to Use Node.js
Cesium is an open-source project. The GitHub download URL is: https://github.com/AnalyticalGraphicsInc/cesium
The simplest installation method is regular JS file loading — just download the JS code from GitHub, place it in your project, and reference it in your HTML page. Like this:
Create a new helloworld.html:
| |
Create a new app.js:
| |
Here, cesiumContainer is the id of the HTML div that displays the map. It’s that simple — open the HTML page in a browser and you’ll see a 3D globe. The base map is Microsoft imagery loaded onto the 3D globe, with basic online map features including zoom in, zoom out, and pan. It also includes a timeline and other time-related widgets, which is a distinctive feature of Cesium — its maps, objects, and scenes can all be associated with time.
Local Hello World Program
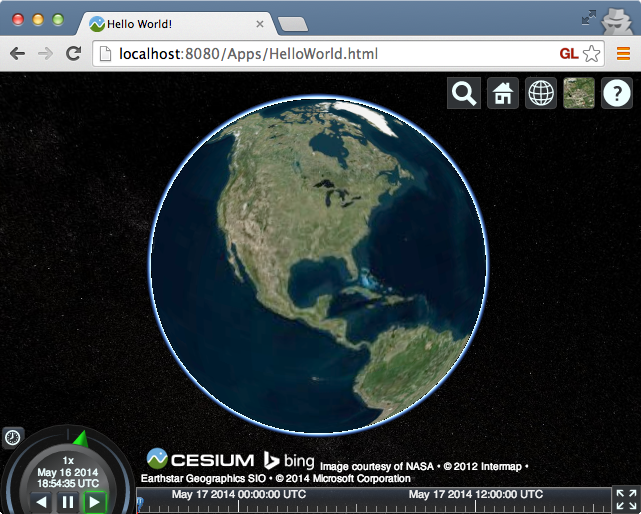
Now that the local Node server is running, open your browser and navigate to: http://localhost:8080/Apps/HelloWorld.html.
You should see a Hello World 3D digital globe identical to the official one.
Hello World Code Analysis
The official Hello World code is as follows:
| |
The following four steps add Cesium to the HTML:
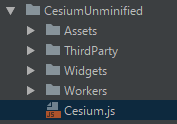
- Include Cesium.js, which defines the Cesium object:
| |
- Import the Cesium Viewer widget styles:
| |
- The Cesium view resides in this div:
| |
- Finally, create the Cesium viewer:
| |
Cesium Chinese Website QQ Group: 807482793
Original link: http://cesiumcn.org/topic/138.html | Quick access: http://cesium.coinidea.com/topic/137.html