1. UEditor + Node.js Image Upload
UEditor is a feature-rich open-source rich text editor by Baidu.
Download link: http://ueditor.baidu.com/website/download.html
It currently provides versions for PHP, ASP, .Net, and JSP. UEditor is primarily built with frontend HTML, CSS, and JS. The reason it is further divided by server-side language is, in my understanding, mainly for the image upload functionality which involves server interaction.
Among the many versions, there is no Node.js version. Below I will explain how to convert the PHP version of UEditor into a Node.js version.
After examining all requests in the PHP version, I found that the action parameter values include config (configuration file), uploadimage (image upload), listimage (online management), and catchimage (image capture). So we just need to rewrite these 4 request handlers to meet our needs.
1.1 Modify the serverUrl property in UEditor’s ueditor.config.js:
| |
1.2 Rename ueditor/php/config.json to config.js and move it to the ueditor directory.
1.3 Next, write the four corresponding actions on the Node.js side. The image upload uses the connect-busboy middleware. Code as follows:
| |
The above mainly references this blog: http://www.xiaoboy.com/detail/1341545081.html
2. GoLang Installation and Configuration
In section 1, UEditor uploads images to the /public/uploads/ folder on the Node.js server. If you need an image server with high storage, portability, and scalability, you need to set up a dedicated server. This article uses the open-source distributed image (file) server seaweedfs.
GitHub link: https://github.com/chrislusf/seaweedfs
This server is written in GoLang, so you need to install and configure GoLang. Download link for China: http://www.golangtc.com/download – choose the appropriate package for your operating system. This article demonstrates installation on Windows 7 x64. After a straightforward installation, you need to configure the following environment variables:
| |
The GOPATH environment variable is very important – your own code must be placed in the directory configured by this variable for the Go compiler to find and compile it.
3. Compiling and Running seaweedfs
Clone the seaweedfs code from GitHub, then follow the makefile instructions or run the makefile directly. In the seaweedfs directory, run the following commands in the console:
| |
Some dependencies may fail to download during go get and need to be downloaded manually and placed in the \seaweedfs\src directory.
Here is a recommended Go package download site: https://gopm.io/download?pkgname=golang.org/x/net
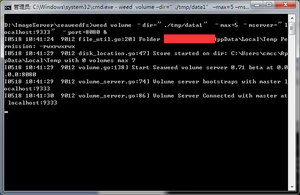
After building, a weed binary will be generated in the seaweedfs directory. You can also rename it to weed.exe. Now you can start weed. Using the local machine as an example:
| |
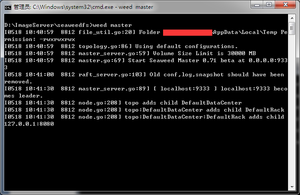
| |
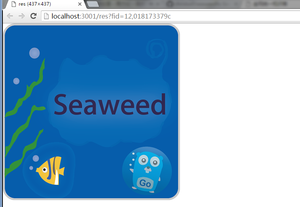
Following the GitHub instructions, uploading and downloading images works without issues. At this point, the basic image server setup is complete.
Modify the Node.js image upload code as follows:
| |
Running result: