Cesium应用程序另一个关键元素是Imagery(图层)。瓦片图集合根据不同的投影方式映射到虚拟的三维数字地球表面。依赖于相机指向地表的方向和距离,Cesium会去请求和渲染不同层级的图层详细信息。
多种图层能够被添加、移除、排序和适应到Cesium中。
Cesium提供了一系列方法用于处理图层,比如颜色自适应,图层叠加融合。一些样例代码如下:
- Adding basic imagery添加基本图层
- Adjusting imagery colors自适应图层颜色
- Manipulating and ordering imagery layers控制调整图层顺序
- Splitting imagery layers切割图层
Cesium提供了各种**接口**支持各样的图层数据源。
支持的图层格式
- wms
- TMS
- WMTS (with time dynamic imagery)
- ArcGIS
- Bing Maps
- Google Earth
- Mapbox
- OpenStreetMap
注意:不同的数据源需要不同的认证 - 需要确保自己能够有权限访问到这些数据源,自然地需要注册特定的认证才可以
默认地,Cesium使用Bing Maps作为默认的图层。这个图层被打包进Viewer中用于演示。Cesium需要您自己创建**ion account**然后生成一个access key用于访问图层数据。
在接下来的例子中,将使用Cesium ion中的Sentinel-2图层。
去Cesium ion页面,将Sentinel-2图层加入到自己的assets中。点击在导航栏中点击“Asset Depot”
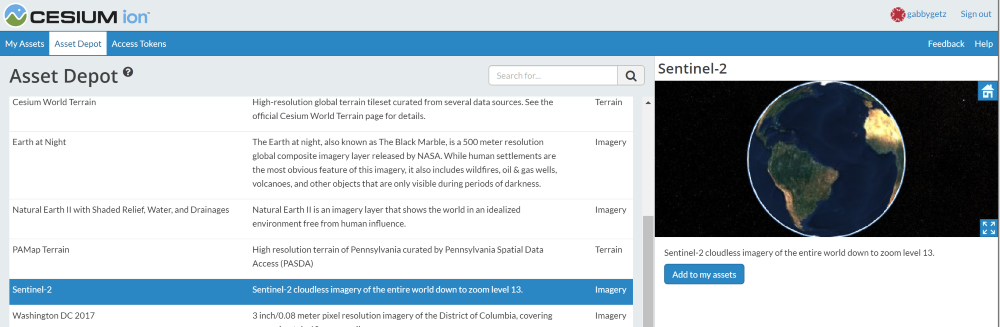
点击“Add to my assets”。Sentinel-2将在你个人用户中的asset列表(My Assets)中出现,此时将在个人的app中图层数据源变得可用。
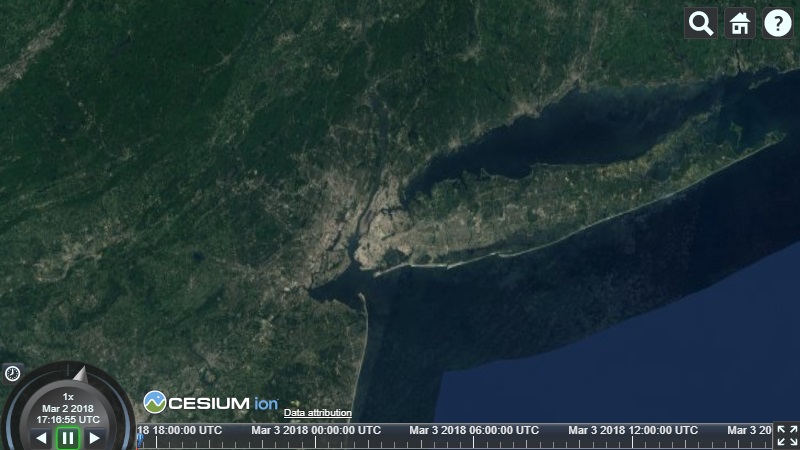
代码级别:我们创建一个IonImageryProvider,将assetId传给对应的Sentinel-2图层。然后我们将ImageryProvider添加到viewer.imageryLayers。
| |
基于上述的代码,我们的Cesium应用程序在缩进zoom in的时候会看到如下图层:
关于图层的更多信息:请访问Imagery Layers Tutorial
Cesium中文网交流QQ群:807482793
原文链接:http://cesiumcn.org/topic/156.html | 国内快速访问:http://cesium.coinidea.com/topic/156.html